
Last time in Part 1, we started to explore Terry Richardson’s iconic snapshot style that’s influenced a generation of photographers and created the modern look for fashion photography. Controversies aside, Uncle Terry breaks the traditional “rules” with his use of harsh direct lighting and a shadow that hugs the model. In this part, we will discuss his setup and the gear you can buy to achieve that look.
Terry’s Methodology
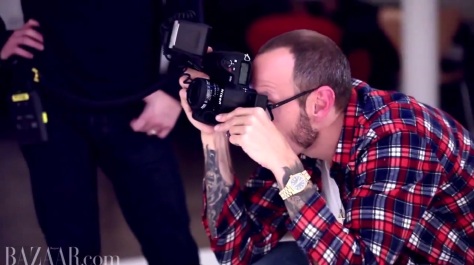
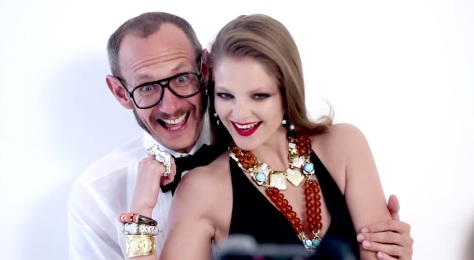
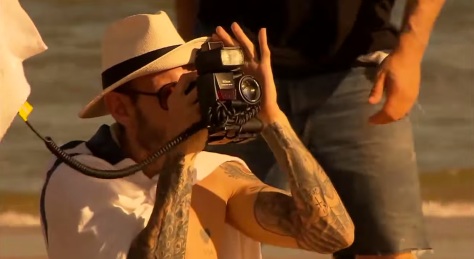
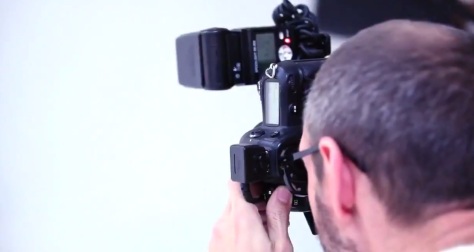
A good way of understanding the magic behind his camera is to check out his behind-the-scene videos and interviews. With music rocking and a team of assistants behind him, his shoots are laid back yet up tempo. It’s fast, dynamic, and interactive. From these stills, you can see he shoots with a Nikon (D3X I think) and a single speed-light.
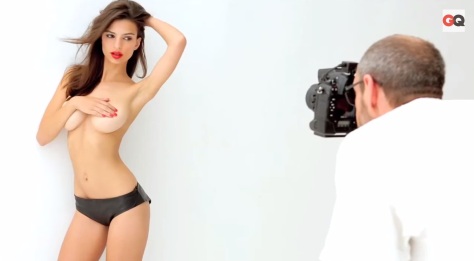
More often than not, he shoots in front of a white background. It could be a seamless paper background, but usually it’s just a plain wall. But a brick wall, a chain-link fence, a concrete wall, some green bushes, just about any background will do. The model is fairly close to the background, leaning up against it, or within a foot of it. From my experience in doing test shoots, this is fairly important to get the shadow looking right. If the model stands too far away, the shadow becomes diffuse and the look becomes something else.
Lastly, the flash is placed as close to the 50mm lens as possible. Mounting it this way wraps the shadow closely around the model’s body. This gives it that direct hard flash look, commonly associated with point-and-shoot or other lo-fi cameras.
The Gear
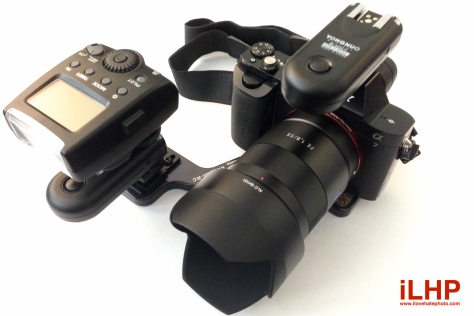
This is the basic gear needed on the Sony A7. If you use another system, some of these items will obviously be interchangeable.

- CB Mini-RC Bracket ($47) – This is the bracket Terry uses to attach the speedlight to his Nikon. The design places the flash right next to the lens, while it leaves your hand free to adjust the camera controls. For $47, it is a grossly overpriced piece of anodized aluminum, but there really is no way around this. There are no competing brands that offer anything similar. I suppose a straight metal bracket could work, but if you mount to the right, it will bump into your camera hand. If you mount it to the left, it’ll be up against your nose. Come on accessories manufacturers, make something more affordable.
- 1/4″ Hot Shoe Adapter ($5) – To add insult to injury, the CB Mini-RC does not come with a hot shoe mount. It only comes with a 1/4″ mounting screw. So if you buy the bracket itself, you’ll have no way of mounting a flash to it. This $5 add-on item at Amazon is particularly nice. It is very low profile, so it doesn’t make the flash unit sit any higher than it needs to. More on this next.
- Meike MK300 Speedlight ($53)– This is the ideal setup for the Sony A7. As for Canon and Nikon users shooting without a battery grip, height of the flash could also be an issue. I would suggest the Canon 270EX or the Nikon SB-300 in addition to this Meike unit. The reasons why I chose this particular manual flash were for its (1) low height, (2) fully adjustable manual control, and (3) relative power. The Sony A7 is minuscule at only 3.7″ (95mm) tall. Most normal full-size flashes are already taller than that. Coupled with the bracket, an hot shoe adapter, and a hot shoe, it will add about another 2″ to that height. A normal full size flash will sit much higher than the lens or the Sony A7 itself. This Meike flash is low-profile enough to make it work. It is a fully adjustable manual so there is no through-the-lens (TTL) exposure calculation. But TTL is really unnecessary here. Manual flash is easy to use with a little trial and error. Lastly, you’ll notice two coiled cords on Terry’s setup. One of them is connecting the speedlight to an extended battery pack hooked onto his belt. I elected for forego this option and just bought some extra batteries instead.
- Yongnuo RF 603II Wireless Triggers ($32) – Since the flash is mounted off camera, you’ll need a way of firing the flash wirelessly (the built-in IR trigger on most flashes won’t work here since the flash is facing the wrong way). Terry uses an off-camera shoe cord (this is the other coiled cord). If you are a Canon or Nikon user, this is preferable because it may retain the TTL capabilities of the flash when mounted off camera. Since I am going full manual, I could go the wireless route. Yongnuo (永诺) is the dope. It makes some of the most reliable and affordable off-brand flashes and wireless triggers. The RF 603II comes in a pair and each is a simple transmitter&receiver. It also comes with a cord that attaches to the camera to act as wireless shutter trigger.
- Your Normal Prime Lens ($$) – This obviously will depend on what you shoot with. A 50mm FF equivalent lens is ideal (which means a 35mm on an APS-C sensor). I use my trusty Zeiss 55mm f/1.8.
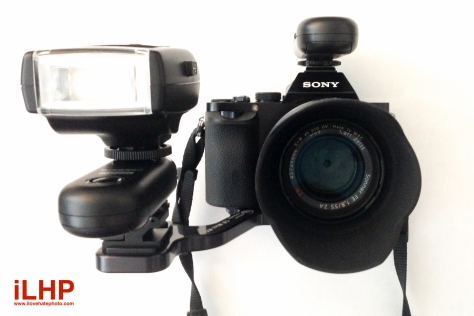
The Simple Setup
 The result is a simple, light, and self-contained one-light setup that you can shoot very quickly. It’s incredibly easy to carry, use, and from the listed prices, also quite inexpensive. It doesn’t get in the way of the creative process. It doesn’t add much bulk to the Sony A7 and from my test shoots so far, everything works consistently and reliably.
A few words on camera settings before I go in-depth in Part 3. Set the aperture between f/4 – 5.6, with ISO at 100, and a shutter speed faster than 1/60s to ensure images with no motion blur. Adjust the manual flash accordingly with a few test shots, and make sure it is slightly underexposed on the Sony A7. As I mentioned before, the Sony A7 doesn’t like to be overexposed. It is great at recovering dark and underexposed areas but overexposed details are forever lost with this sensor.
How did this setup work out? In Part 3, I will discuss the several test shoots I’ve done with this setup, go in-depth with the flash settings, and show you guys the results I’ve obtained. Plus, there will be a surprise in store to round out this discussion. Stay tuned.

A ringlight has a very similar, but much nicer look, I think. But can’t argue with TR’s success; he’s made plenty of $$ with his point-and-shoot look.
A ring light (something like Alienbees ARB800) would wrap a softer shadow around the model because of its larger size. But you’re right, it would be similar because of its proximity to the lens.
So, informative I thought he was using a 35mm on his D3X for Pirelli.. As some of his shots tend to be wider angle. Interesting nonetheless! Can’t wait for Part 3 🙂
Thanks for your kind words. I’m sure he switches it up from time to time. The Yashica T4/5 point and shoot he used to use was 35mm f/3.5. Any lens in the normal range should work.
Very nice and well documented article!